Open Visual
Studio 2008 and choose "File", "New",
"Project..." in the main menu. Choose "WPF Application" as
project type.
Choose a folder
for your project and give it a name. Then press "OK"
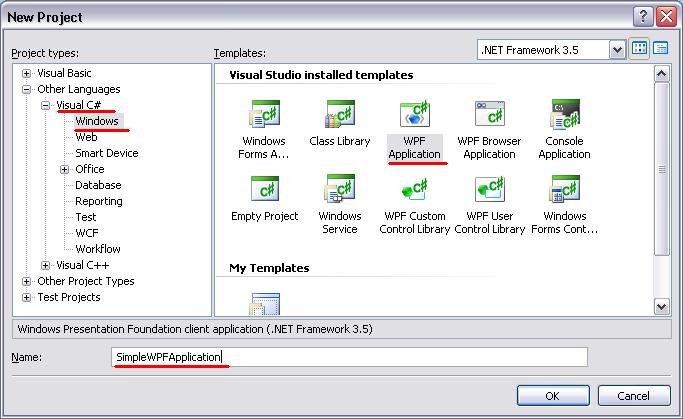
Notice: Here I have selected Visual C# as Language, you can select Visual Basic also.
After you hit Ok button, Visual studio will create following file structure.
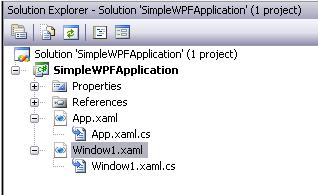
What is App.Xaml and App.Xaml.cs
In each WPF application there is an App.xaml (and its corresponding code file, App.xaml.cs or App.xaml.vb) which works as a global file for application wide declarations. You can use this file to declare a constant look and feel across your application. For example you can declare a default red background for all buttons in an application.
What is Window1.Xaml and Window1.Xaml.cs
A Windows Presentation Foundation application consists of two things: Code and Markup. The code part may be written with one of the available .NET languages such as C# or Visual Basic but the markup part is constant and is written with XAML.
Incase you are asp.net developer, you will find Window1.Xaml is similar to UI page i.e. .aspx page and Window1.Xaml.cs as code behind page i.e. .aspx.cs page.
What is XAML
In simple term XAML is markup language which is used in WPF or Silverlight Application to create UI. In following figure Markup code is XAML. Please refer to XAML section for getting more details on XAML.

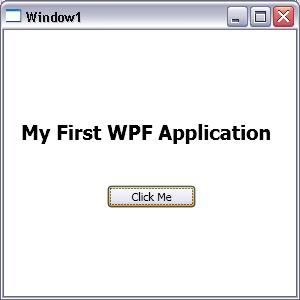
Ok, now you have basic of what the application structure is, lets create a simple application in WPF which will consist of Label and Button and display "My First WPF Application" on clicking that button.
As shown in above figure.
Step 1) Drag and Drop Button Control and Label control from Toolbox.
Step 2) Change Name Property of Button and Label.
Assign Name Property of Button to "btnClickMe" and Assign Name Property of Label to "lblMessage"
(Note: Name Property is similar to Id Property in Windows C# or VB.Net.)
<Label Height="44" Margin="12,85,12,0" Name="lblMessage" FontSize="20" FontWeight="bold" VerticalAlignment="Top"></Label>
<Button Height="23" Margin="103,0,100,88" Name="btnClickMe" VerticalAlignment="Bottom" Click="btnClickMe_Click">Click Me</Button>
Step 3) Double Click on button control in designer window and it will create click event in code behind file.
Step 4) In Code Behind File.
private void btnClickMe_Click(object sender, RoutedEventArgs e)
{

}
Now Assign Content Property of Label to Text you would like to display.
(Note: Label Content Property is similar to Text Property in Windows C# or VB.Net)
private void btnClickMe_Click(object sender, RoutedEventArgs e)
{
    lblMessage.Content = "My First WPF Application";
}
Step5) Hit "F5" to execute WPF Application, now hit "Click Me" button and it would say text, "My First WPF Application".